How to Find a New Place For a Cold Frame (and Improve Upon Last Year’s Design)
Hi, I’m Nathaniel, and I will be occasionally writing here now (I believe my lovely wife was kind enough to introduce me). So anyway, nice to meet everybody. I hope you all find what I write about interesting and valuable.
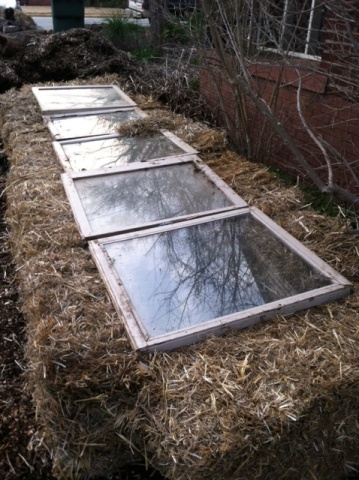
In an effort to get our seed trays out of the house earlier last year, Eliza and I decided to make a cheap and easy cold frame out of straw bales and used windows. You can read all about it in this previous post. Last year’s cold frame was a huge success. Not only did it mean we didn’t have to worry about tripping over seed trays or having our cats eat all our seedlings, but it also got our young plants out in the sun and fresh air, with ample protection from the occasionally chill nights of March/April. Needless to say we were hooked and all about having a cold frame again this year. However, in the time frame from last year to this year, complications of placement had arisen.
Late last summer (or early autumn) we had come into possession of a massive pile of felled maple wood. After several months of “curing” we finally got the wood split and chopped to manageable and movable sizes (originally many of the logs easily weighed 100 lbs a piece, and were very burdensome to move). With all the split logs, we needed a place to store the abundance of wood. It just so happened that the spot where the cold frame sat last year was an ideal location for storing a pile of split wood. So, we removed the decayed remains of last year’s cold frame (after being in the elements constantly, the straw bales were well on the way to becoming lovely compost) and then stacked our wood pile in its former spot. Great, but now we didn’t have a cold frame spot.

Photo Caption: Last year’s cold frame was built at the end of our shed. This photo we took went viral on Pinterest.
Fast forward to this past weekend. With the combination of having attended the 2013 Organic Growers School in Asheville on Saturday (thus getting all excited about the growing season), a stack of seed trays with early seedlings demanding space and sunlight in our bathroom, and the extra evening light provided by switching to Daylight Savings time, Sunday seemed like a day for building this year’s cold frame. The question was “where?” While our yard is not remotely small for an urban setting, we’ve intentionally maximized the use of most of the available space. While cold frames do not have to be gigantic, with all our seed trays we knew we’d need at least 30 square feet of space (and really, considering the size of the used windows, this would have to be a 3′-by-10′ rectangle – or slightly larger). With this in mind we set out into the yard to examine the options.
For a cold frame to work well we needed to locate it where it was going to get a fair amount of sun throughout the day (nothing is going to grow too well in heavy shade). The north face of our yard was immediately ruled out because it is both shaded by the house and a number of large trees (not to mention that much of it is chicken run territory, and knowing the love our chickens have at scratching it seemed likely that a straw bale structure would be short lived in their domain). The remainder of the back yard was almost all raised beds for growing in. We didn’t want to compromise this layout, as we had already determined we wanted to use the full garden area. This left the south side of the house, leading to the driveway (same side of the yard that last year’s cold frame had been built on). This spot was ideal for sunlight purposes, but, with a pile of split wood, two large pomegranate trees, a row of raspberries and blackberries, and a driveway (currently partially occupied by pile of wood chip mulch), this would be a tight fit.
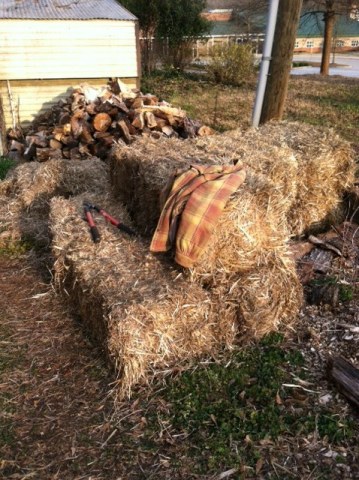
Photo Caption: With a large stack of wood there now, last year’s location was no longer available for cold frame space.
Oh, but hey, what luck we had, for those pomegranates looked mighty ready to have a good pruning and there was plenty of space right below the branches that needed to go. Here’s to killing two birds with one stone. The spiky pomegranate branches would be out of our way, and our seedlings would have a good space for a protective cold frame. Victory!
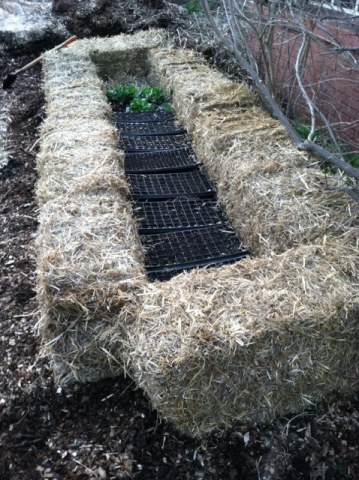
As far as design went, our new cold frame is almost identical to last year’s. We only made a couple major improvements by sheet mulching underneath it and making sure that torrents of rain couldn’t pour through the window cracks to displace the seedlings from their pots.
To sheet mulch, we spread a layer of flattened cardboard boxes underneath the structure. Inside the cold frame we put about an eight inch layer of extra straw as ground mulch/insulation. Both of these adjustments were done because last year we had weeds growing up through the base as the season went on. For the rain problem we just spaced the trays so that no seedling was directly underneath the cracks. That way the rain won’t land directly on them and splash the soil out of the tray.
So now we have a new cold frame. While we did have to buy some new straw bales, that was a small cost. Free items that went into the assembly include the cardboard (from broken down boxes I took from work), the windows (which a friend had given us last year), and a bunch of extra straw (which was laying all over the place when we bought our bales, so we asked if we could have it. Obviously the answer was “yes”). Within reason, a wood-framed version would probably be less expensive in the long run in that it would primarily be a one-time expense. However, it would be less movable if we needed to rearrange the space (not impossible, mind you, just not as easy). Also, we kind of like all the carbon matter we can salvage from these straw bale cold frames at the end of the season.
…Oh yeah, the wooden frames also require a bit more construction savvy, which, as mentioned in last year’s post, neither of us are particularly up on (but which we’re hoping to improve. More on that when it comes about).
So now our seedlings have a good protected home while they begin their life and we have another nice cold frame for the year. It makes our yard look a little different than last year, but in a good way. If there is one thing I feel I’ve learned about urban gardening/homesteading, it’s that there is a constant mode of experimentation and improvement. If things change from year to year, that is a good thing, because it means we’re trying new things. So, 2013 cold frame, here’s to you being our “new thing” this week.
Now, some photos from the construction process:

Photo Caption: We laid out a bunch of overlapping cardboard first. We did not bother to dampen this cardboard before putting the cold frame atop it, but you can if you want it to stay in place better.
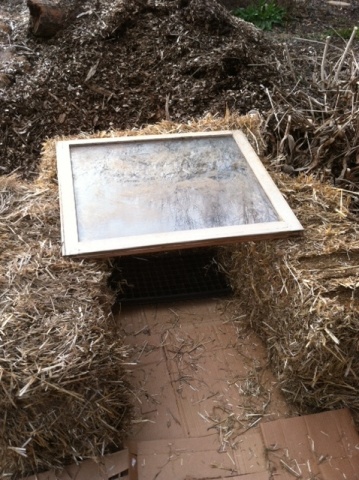
Photo Caption: We needed to make sure that the cold frame would be both wide enough for the seed trays to fit inside it, but not so wide that the windows couldn’t sit on top of it.
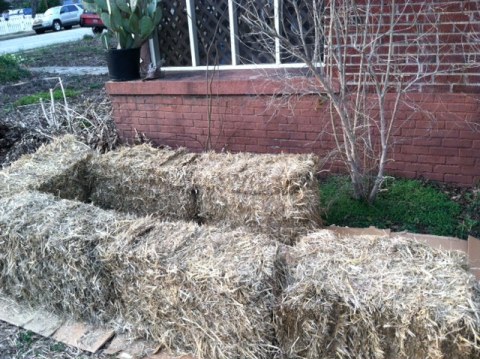
Photo Caption: We placed the bales down the length of the cardboard, checking the spacing as we went along.
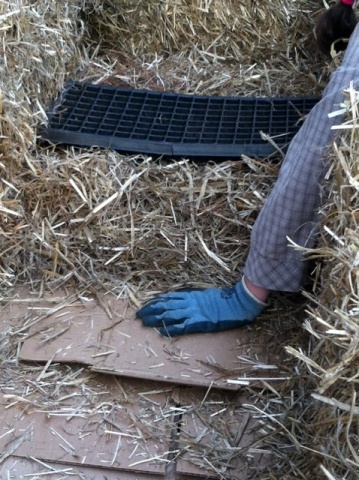
Photo Caption: We placed about eight inches worth of straw mulch on the floor of the cold frame. This will serve both to prevent any weeds breaking through, as well as adding a bit of extra insulation.
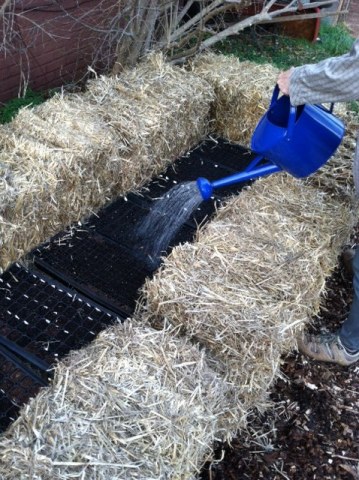
Photo Caption: We gave all our seedlings a good drink for the night. Honestly, I’m just including this photo because I like how blue our new watering can looks in it.
~Nathaniel
9 thoughts on “How to Find a New Place For a Cold Frame (and Improve Upon Last Year’s Design)”
Comments are closed.


Janet, The Queen of Seaford - March 12, 2013 8:15 pm
Quite ingenious. I remember last year’s posting where Eliza did the straw bales. That is a lot of seed trays! What are you growing?
Janet, The Queen of Seaford´s last blog post ..A Second Flush And Other Tidbits
Nathaniel Lord
Twitter: nhlord
- March 13, 2013 10:08 am
We’re growing a little of everything right now. Some spring crops (a lot of swiss chard) as well as later crops like tomatoes and peppers. We’ve actually got a lot of tomato root stock plants growing right now, which we’ll be trying some grafting with eventually (and which Eliza or I will probably write more about here when we do). Thanks for the comment!
Donna - March 12, 2013 8:52 pm
Nice job. The farm makes these straw bale seed frames too, when the polyframe houses are full. They don’t start the seeds in them, but plant early plugs and starts.
Donna´s last blog post ..Digital Painting Process – Red-Tailed Hawk
Nathaniel Lord
Twitter: nhlord
- March 13, 2013 10:10 am
I’ve heard about planting plugs directly in bales but have never tried it myself. I wonder, with all the straw mulch we laid inside the cold frame, whether it would be worth trying. Probably we’ll just put any plugs we have in the ground at that time, but we’ll see.
Flâneur Gardener
Twitter: flaneurgarden
- March 13, 2013 11:48 am
I’m still a definite fan of the straw bale cold frame! I wish I could do something like that, but in an apartment I guess people would start complaining if I constructed one on the pavement outside the building…
And I think in any garden it’s good to shake things up a bit every year; move a cold frame or create a new flower bed, just so you keep looking at the garden with fresh eyes and can see what works and what doesn’t…
Flâneur Gardener´s last blog post ..On a Spring Morning in March
Nathaniel Lord
Twitter: nhlord
- March 13, 2013 12:05 pm
I think shaking things up is vital to the whole gardening process. It is when we get stuck in the mindset of “well this is the best that can be done” that we’re apt to encounter the biggest problems. So much of growing things requires a constant flexibility and willingness to change and adapt to different variable. In the scheme of things, having to find a new spot for a cold frame each year is a pretty small order in comparison to the other potential challenges a garden could throw at you.
You should just make a cold frame on the side walk anyways. Better to ask forgiveness than permission. And who knows, folks might get real excited about the prospect of fresh grown food.
Flâneur Gardener
Twitter: flaneurgarden
- March 13, 2013 12:22 pm
Living on the fourth floor does give some challenges when it comes to protecting a cold frame on the side walk, so I think it’s best to continue using the windows – and then bringing the seedlings on a bus, a train and another bus up to the garden by our holiday home once the frost is gone for good.
But yes, there are worse challenges than having to relocate a cold frame, but at the end of the day most can be overcome as long as we remember to enjoy ourselves and love our gardens.
Flâneur Gardener´s last blog post ..On a Spring Morning in March
Joan - March 20, 2013 9:55 pm
Glad to see you adding to the blog!
Pingback: How to Deal with Pillbugs When They Become a Problem | Appalachian Feet